|
A teacher asked me if it was possible to 3Dprint on leather and that it would stick. The theorie behind this question was that if we can 3Dprint prosthetic directly on the skin of people we may find some benefits of it instead of making the regular prosthetics we know today. So i got a 3.5 mm thick piece of leather and put that in my craftbot+ on the plate where my printbed would normally rest on. then i taped a thermometer on the leather to measure the heat that goes trough the leather. which is if you set the printbed to 110 degrees celsius the leather is 65 degrees celsius. sadly pla did not stick to the leather while printing but tpu98A does stick to the leather. and it is a flexible filament so it flexes a bit with the leather. i printed two objects on the leather. one finished successfully and the other unfinished one was the first test with tpu98A which i canceled to do the other print. after the leather cooled down the prints kept sticking so it works in practice but i have my doubts about 3Dprinting directly on human living skin because the material is 245 degrees Celsius so it will heavily burn your skin. which does not sound so improving to me. also the skin does not have a hard undersurface so the skin is to unstable to print something directly on it. so this idea has potential but there are many hurdes to overkom if people really want to use this method.
material link: http://www.eyeon3d.nl/product/tpu98a-filaments/
0 Reacties
i wanted to play with some electronics in my commando cosplay and this droid i had in mind seemed perfect for it. i designed the head to screw open so i could put the electronics in it. the overall look of the droid is designed like the body of a crab and i can hang it on my belt if i don`t want to hold it in my hand. the legs are articulated and held together by M5 allen screws which are carefully tucked away on the legs. i learned a lot with this prop like how big electronics can get and that i can hide the seams by melting pla wire over the seam and then sand it even with the rest of the body. i am really happy with how it turned out and am gonna use electronic more often now. i wanted for a commando cosplay that i put together a highly detailed wrist computer. first i wrote a little story in my had of what would be handy to have in the wrist-computer. then i made a list of stuff that would have to go in the computer to mimic those features. (phone as a working screen, old mouse buttons for clicking sounds, a USB cable to hack computers.) after the list i started drawing the computer with solidworks to tinker with places where everything had to go and how i got my phone and harm in and out of the computer. eventually it became a 3 part system that would stay together by screws. then i printed it and the result looked amazing and it really did put some story to my cosplay. This my 3D printed version of the pool party graves gun from league of legends. A friend asked me to make it for his cosplay. After two months of drawing it over from internet pictures for references. I printed it in 6 weeks but assembly took me because of sanding and school another 3 months. After drawing the big gun in one piece I drew over the drawing to cut out every single piece and added ways to put the gun back together. From the tip of the barrel to the beginning of the shoulder stock is almost everything screwed together except the outer parts who are reinforced with plastic rods glued on the inside. The water tanks are clear pvc pipes painted blue from the inside.
The guns weights around 5 to 6 kilo`s and it is 1.2 meters long and 30 cm wide. This thing was a big journey with loads of accidents and lessons learned through the hard way. A couple of these lessons are:
A friend of me asked me if i could 3D print the gun from a league of legends champion. there where no stl drawings so i took the challenge to to it myself. After a few months of drawing i have finally completed the drawing and i am so proud of my self. but now comes the real challenge of printing it because it has to be 1:1 and this thing is longer than a meter.
Always when I am working on my laptop and I am waiting on a message or I want to follow a conversation on Whats App I need to look away from my screen every time my phone vibrates. This really irritates me so I decided to do something about it.
First I thought about a stand where I can put it on but then I still had to look too much away from my screen so that option dropped out rather quickly. Then I thought about a stand that I could attach to my screen. So went drawing on solid works and measured my phone and laptop screen. While I was doing this I started thinking about a way to put it on either side of my screen or on top of it. So I putted the clips on both sides of the case. But then I realized. What if I want to put my earbuds in the phone or I want to recharge it. After I brainstormed about this for a while I came up with a hole that is 2 mm smaller than the hole where I put my phone in and did this on the upper or lower part of the case. For the holding clamps I simply made the clamps 1 mm smaller than the thickness of my laptop screen. After using this thing for a few days I am to the conclusion that this thing is pretty handy and I have no regrets that I printed this thing. with solidworks i have drawn a wheel from the conveyor belts from my work. With this wheel i want to experiment if a 3D printed ABS wheel is able to do the work just as well as the original. For this experiment i will look at the wear and tear on the wheels and the rubber bands who are on the wheels. I will also look at at the rate this wheel is able to run. The printed wheel on this image is from PLA so i will not use it for my experiment because PLA is not rigid enough to do the work. This wheel was only printed in PLA to test the design.
 Het is al algemeen bekend dat je veel kunt maken met 3D printen, maar hoe veel verschilt van persoon tot persoon. Vorig jaar leerde ik dat je met een flexibel materiaal rubbere opjecten kunt printen zoals telefoon hoesjes. Tijdens een opendag begon ik met mijn eigen hoesje te ontwerpen (dit hoesje was niet gelukt te printen maar ik werk de paar kleine foutjes er nog uit). maar een mevrouw was wel geintresseerd in een eigen hoesje voor haar vrij oude telefoon waar geen hoesjes meer voor gemaakt werden. Na wat gepraat te hebben gaf ze me de opdracht om een hoesje voor haar te maken met een paar eisen. 1. het hoesje moet voor een nokia 900 zijn. 2. het hoesje moet de naam van haar bedrijf hebben. 3. het hoesje moet goudkleurig zijn. Om te beginnen heb ik de afmetingen van haar telefoon opgezocht en een begin blok gemaakt op tinkercad. dit blok heb ik stap voor stap aangepast tot dat het een hoesje was wat ik goed vond. Denk hierbij aan afgeronde randen, een goede dikte en ruimte voor de camera. daarna heb ik beetje bij beetje haar bedrijfsnaam en logo na gemaakt en op het hoesje gezet. Daarna heb ik met PLA van Lay3rs een proefhoesje gemaakt om te kijken of alle afmetingen klopte. Dit was tevens de eerste keer dat ik met dit merk PLA geprint had en het was verrasend makkelijk om te gebruiken en het hoesje was van goede en stevige kwaliteit zoals ik het nog niet mee gemaakt had. Na het passen heb ik een gouden rol van ninjaflex gekocht uit Groot Britanie. Omdat niemand die ik kende ooit met dit materiaal heeft gewerkt heb ik zo veel mogelijk ervaringen op internet opgezocht om de juiste instellingen voor de printer te bepalen(250 graden celcius en 15 mm/s). maar jammer genoeg had ik het hoesje met het logo naar de printplaat laten printen waardoor het logo onleesbaar werdt. door deze fout liep ik tegen een probleem aan. ik had niet genoeg print materiaal meer en het was te duur om een nieuwe te bestellen. Als oplossing heb ik alleen het logo en een stuk van de rug van het hoesje opnieuw geprint en het slechte logo met een dremel er af geschuurd. de twee delen van het telefoon hoesje heb ik met rubberlijm aan elkaar gelijmd. Ik zal eerlijk zijn, ik vond het hoesje er niet zo mooi uitzien zoals ik het wilde want overal zaten druppels van te veel filament en je zag nog een beetje de lijmnaat maar dit project duurde al 2 maanden te lang en ik moest de klant een hoesje geven dus ik heb het met tegenzin ingeleverd. (on)gelukkig vond de opdrachtgeefster het hoesje geweldig dus het werd goedgekeurd. van deze opdracht heb ik dit geleerd: beloof nooit iets aan een klant voor je zeker weet dat het mogelijk is. sta voor alle ideeen open om het product te maken. hou goed contact met je opdrachtgever want zo voorkom je misverstanden. doe goed onderzoek naar waar je mee werkt zodat je niet een tweede keer het wiel uitvind. en als laatste, beloof geen aflever datum als je niet zeker eet of je die datum kan halen. zo voorkom je werk dat maar half af is. 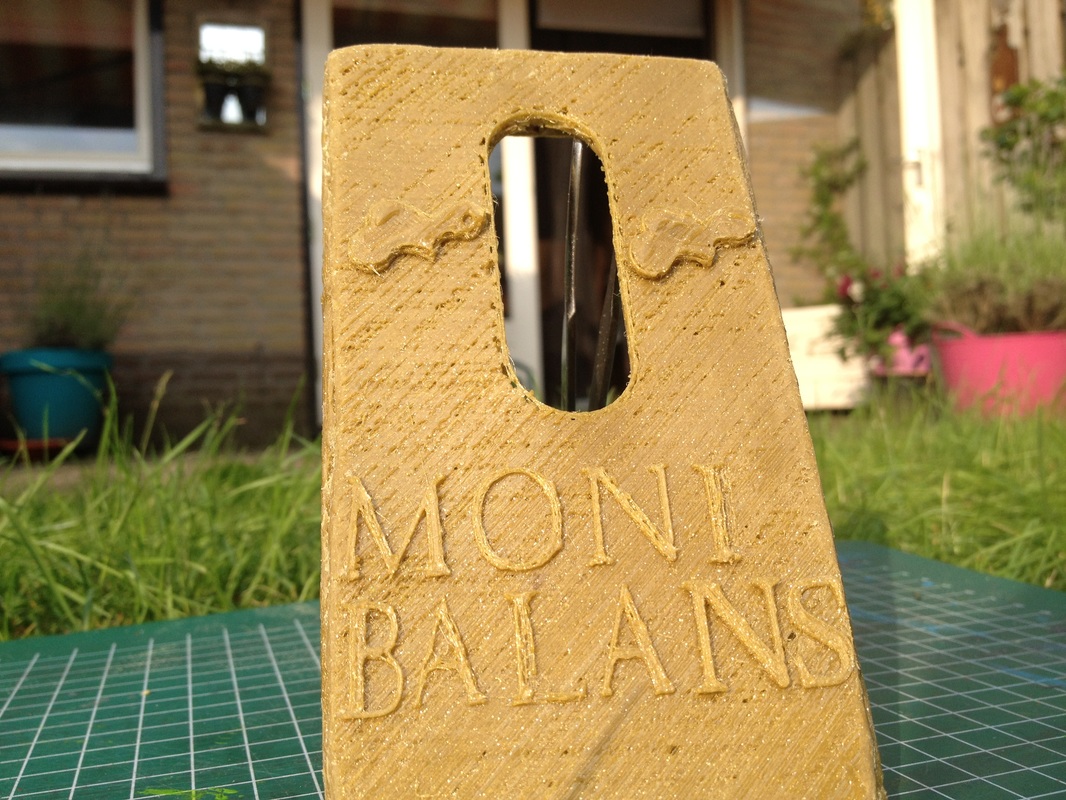 |
 RSS-feed
